Monday, December 29

Art Journaling Backgrounds & Documented Life Project 2015

I am thrilled to announce I will be published in Art Journaling magazine out January 1st.  (Correction: I guess when Stampington said "next" issue they really meant "NEXT next issue" coming out April 1st.  Have to wait another 3 mos!! UGH)  I submitted a small vintage paper and ephemera art journal and was honored they chose it for the bound book section of the magazine.  I'll post pictures soon!

So, this post is about Art Journaling...which I LOVE!!!


My art journal gives me a place to try new techniques, practice, play and not worry about having to be perfect.  Some beautiful things have come about in my journal so I thought I'd share the beginnings of an art journal page background with you over the next couple of posts. It is not finished yet, but here are the beginnings.

I've been playing to warm up for the The Documented Life Project-2015 which starts on January 1st.   It is a free weekly challenge and participants post their photos and exchange ideas all year. Can't wait!

 Here is my process so far.  I started with a little bright ink and some random papers such as hand painted tissue paper and Gelli printed book text.


Added some acrylic ink drips, parts of an old letter and some cursive text stamped in purple.  You can't get too attached to anything specific at this point because you are just building up both visual and tactile texture. 

Then come layers of paint, and stamping through stencils and sequin waste. I added some circles cut out of decorative paper and some hearts from a stencil I cut out of an old cereal box.


Continue on with markers, paint, more stenciling, white gel pen and random marks and here is where we are currently.  I now have to do some small detail work with pens and ink.  I will post more photos later this week. 

I love it so far! I need to find a favorite quote perfect for this page.  And here is the flip side of the journal that I did at the same time.

As always, thanks for stopping by and choose 2015 to start your Art Journal!  Let me know below what quote YOU would add to these pages for the new year.

Happy Journaling!

Jan


Wednesday, December 17

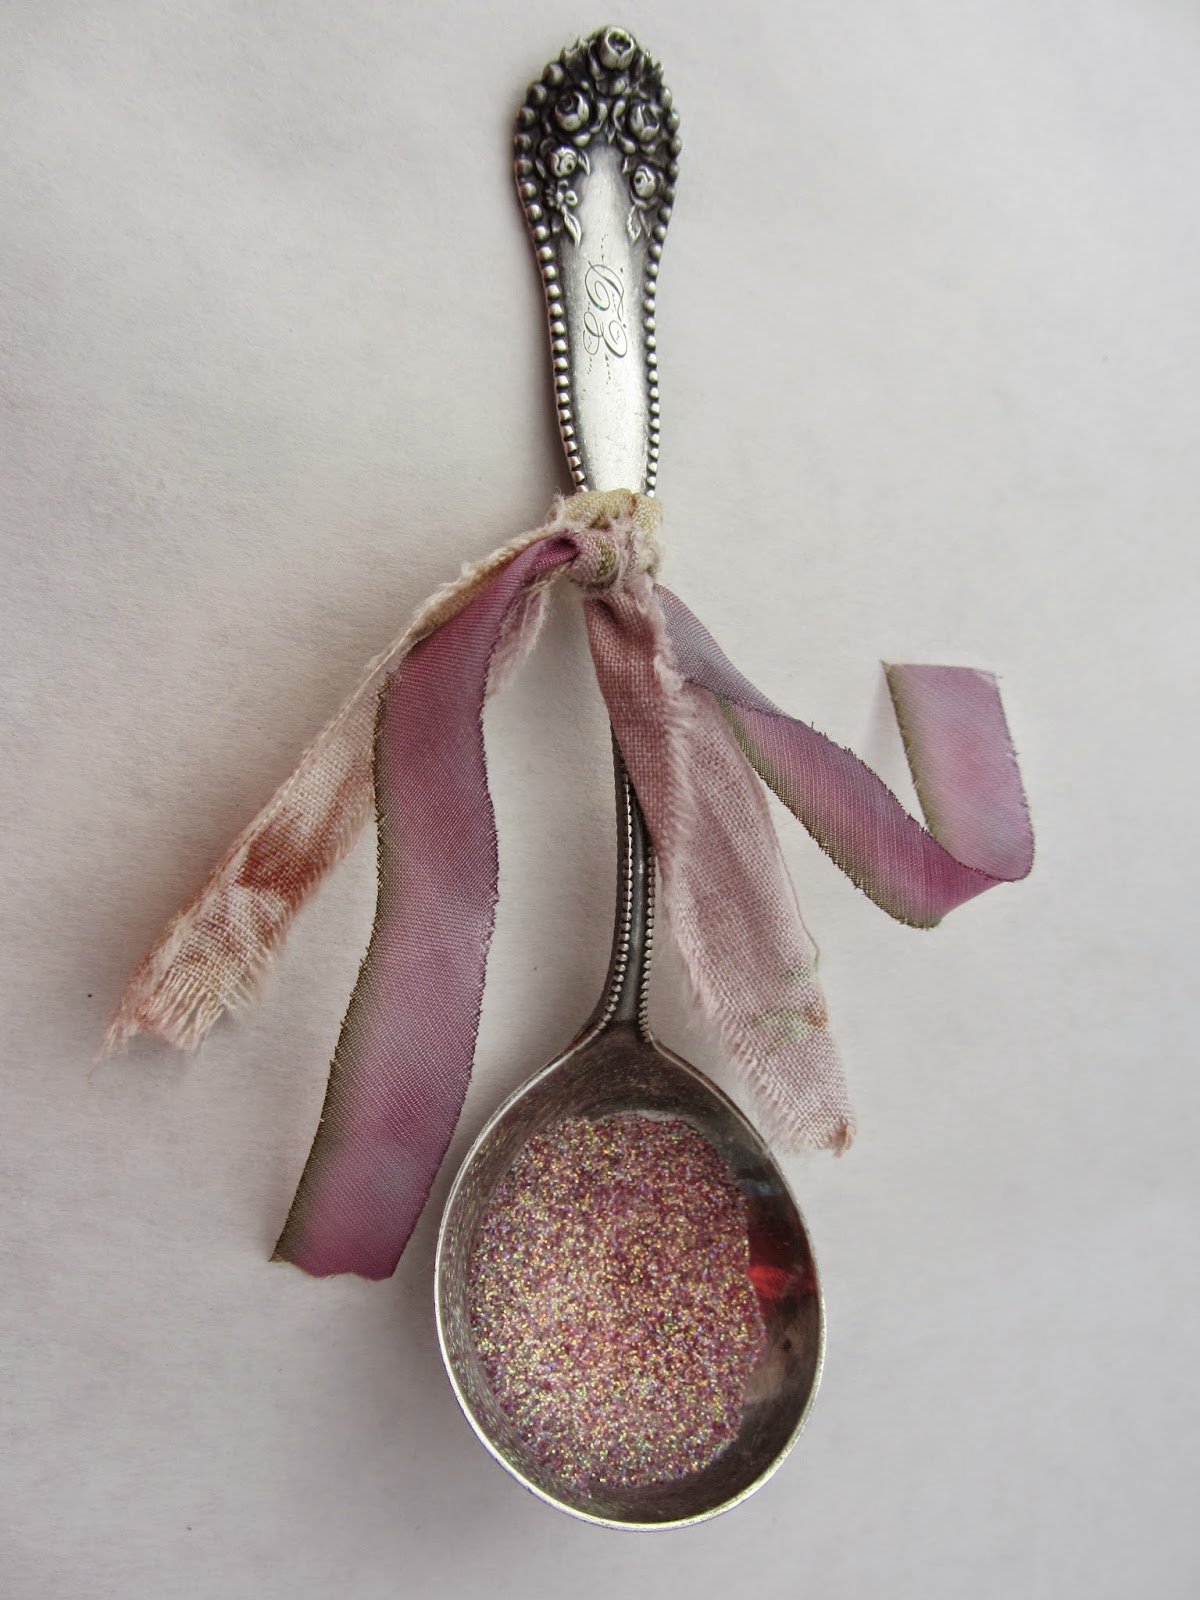
Vintage Flatware Ornament Tutorial


Ok..so let me start by giving credit where credit is due. I saw this idea on Pinterest or Etsy or somewhere as a gift topper idea. I like that..but also I plan to use the small utensils on my vintage Evergleam aluminum Christmas tree as ornaments. 


Here's how to make them. You will need:
  • Silverplate flatware 
  • Adhesive of your choice, clear drying
  • Clear acrylic spray
  • Glitter
  • Ribbons & fabric scraps


Start with some old silverplate flatware. Spoons work best but you could also use flat serving pieces as well.

Polish it well.  I use polishing compound, but silver polish will work fine too.

I seal mine with a gloss spray sealer to help prevent future tarnishing.  Then spread your favorite adhesive in the bowl.  I use E6000 or Goop adhesive.  


Let it settle to smooth out some and then cover it with glitter and pat it down smooth.  Let dry overnight and then tap off excess glitter.  I have used both a fine glitter and a glass glitter.  Both work well and look great!


After that, just find some fabric and ribbon scraps to match your glitter and tie them to the handle.  I tea dyed mine to make them look vintage. I will be drilling a hole on this one below near the tip of the handle to use for an ornament.


Aren't they gorgeous!!


You could also add things to the tied ribbon to hang down in front of the glittered "bowl" such as crystals, small Christmas picks, or small millinery (hat decorations) such as ribbon flowers or small velvet leaves.  Anything your heart desires.  I think these would look great on a tree with small white lights.

Thank you for reading and hope you enjoyed the tutorial. These are fun and easy to make and are beautiful.


You can find old silverplate at flea markets, estate sales and antique shops for about $1 per piece on average. 


Have fun and please share with me the photos of  your results, I'd love to see them!

As always, thanks for stopping by and I love to hear comments below.


Jan

Tuesday, December 16

Tuesday's Tips: DIY Christmas Gift Tags

Okay, sorry about last Tuesday's Tips. I was at Camp Lejuene, NC, to see one of our favorite guys graduate from MCT.  Upon return my computer had given up the ghost to a plethora of computer viruses so had to go to doctor. But, we're all good now!

Today's Tuesday's Tips is all about DIY Christmas Tags. And for you non-DIY folks I've included a BONUS printable download at the end.  Can't get much easier than that!  The links are just under each photo.

First up, reusable chalkboard gift tags from Rust & Sunshine blog, Michelle DuPuis.  These are a little more expensive per tag, but note they are reusable for next year! Great idea!!


This second one is for my little more advanced crafters but is so cute. It is a printable download from pleasenotepaper.com and then some work once printed.  

The trick here would be to find a craft punch the exact size of the ornament print out which is a 2" circle punch, or you could try a circle cutter. Great way to use up leftover Christmas paper or scrapbooking paper scraps.

An alternative would be to just use cut out circles with whatever size punch you have and glue them on top and then draw in the ornament hanger and stamp the greeting. 


One Dog Woof has a lot of simple and easy tags in this blog post, but my favorite is the holly.  How much easier does it get??

Christmas Gift Tags: Holly Sprigs at www.1dogwoof.com


And finally, the printable download from Design Editor blogger Katherine Davis. Cute and easy.

 Classic Christmas Tags


Christmas is next week so I hope this helps you get a head start on your gift wrapping.  I know, I know...some of you are already done! But, perhaps you can add a cute little tag to your gifts instead of writing names on the paper.  We've all done it!

As always, thanks for stopping by and I look forward to, and enjoy, our comments.  Please stop by my Etsy shop, link at the top.

Happy Holidays!

Jan


Tuesday, December 2

Don't Forget Your Pet at Christmas With These Easy DIY Projects

It's so easy to get wrapped up in the holiday rush of parties, meals and gifts and forget about our furry friends.  Below are a couple of easy and quick ideas for you to make sure they're always part of the festivities!

And don't forget to see my vintage trunk turned cat litter box DIY project at the bottom!

Easy dog toy and good way to use up fabric scraps!


Yes, cats are pets too...how cute is she!
cat nip cat toy


Great gift idea of customized dog (or cat) tags.
DIY Personalized Dog Tag How To

And, BONUS, since many of us may travel with our pets over the holidays, here is a great article with tips to travel well with yours. 

Creature Comforts

And here is a photo of one of my own projects which I just love.  


 I hate having open litter boxes around with cats and when you live in a small place you have limited options on where to put them.  Well, I picked up this old chest for $15 at a flea market with a hinged lid and turned it into a cat litter box I felt comfortable putting out in the open.


Here's what I did:
1) Replaced the floor with plywood to strengthen it a bit and then added 4 short furniture legs and some trim.
2) Cut a hole in the side just big enough for the cats, and some small air vents in the back.
3) Painted and distressed the new parts to match.
4) Found a suitable plastic box large enough to serve as a litter box that would fit inside.  

Voila...that's it. Cats love the privacy despite it being out in the open. 


As always, thanks for stopping by and I always enjoy your comments below.

Jan